Port of the SPIFFS library for the Particle platform
Introduction
The excellent SPIFFS library provides a simple file system on a NOR flash chip. This is a port of the library for the Particle platform, with a few convenience helpers to make using it easier from C++ and using standard Particle/Arduino/Wiring APIs.
Both the original SPIFFS library and this port and MIT licensed, so you can use them in open-source or in closed-source commercial products without a fee or license.
The full browsable API documentation can be found here.
Flash Support
This library supports SPI-connected NOR flash chips. These are typically tiny 8-SOIC surface mount chips, intended to be included on your own circuit board. There are also breadboard adapters that are available, shown in the examples below.
The chips are really inexpensive, less than US$0.50 in single quantities for a 1 Mbyte flash. They're available in sizes up to 16 Mbyte.
SPI flash is less expensive than SD cards, and do not need an adapter or card slot. Of course they're not removable.
The underlying SpiFlashRK library library supports SPI NOR flash from
- ISSI, such as a IS25LQ080B.
- Winbond, such as a W25Q32.
- Macronix, such as the MX25L8006EM1I-12G
- The external 1 Mbyte flash on the P1 module.
- Probably others.
It is sometimes possible to find the 8-PDIP (0.3") versions suitable for plugging directly into a breadboard. Both Macronix and Winbond make them, but they're infrequently used and often not available.
It does not support I2C flash, SD cards, or non-flash chips like FRAM.
Instantiating an SpiFlash object
You typically instantiate an object to interface to the flash chip as a global variable:
ISSI flash connected to the primary SPI with A2 as the CS (chip select or SS).
Winbond flash connected to the primary SPI with A2 as the CS (chip select or SS).
Winbond flash connected to the secondary SPI, SPI1, with D5 as the CS (chip select or SS).
Macronix flash connected to the secondary SPI, SPI1, with D5 as the CS (chip select or SS). This is the recommended for use on the E-Series module. Note that the E series requires the MX25L8006EM1I-12G the 0.154", 3.90mm width 8-SOIC package.
The external flash on the P1 module. This extra flash chip is entirely available for your use; it is not used by the system firmware. You can only use this on the P1; it relies on system functions that are not available on other devices.
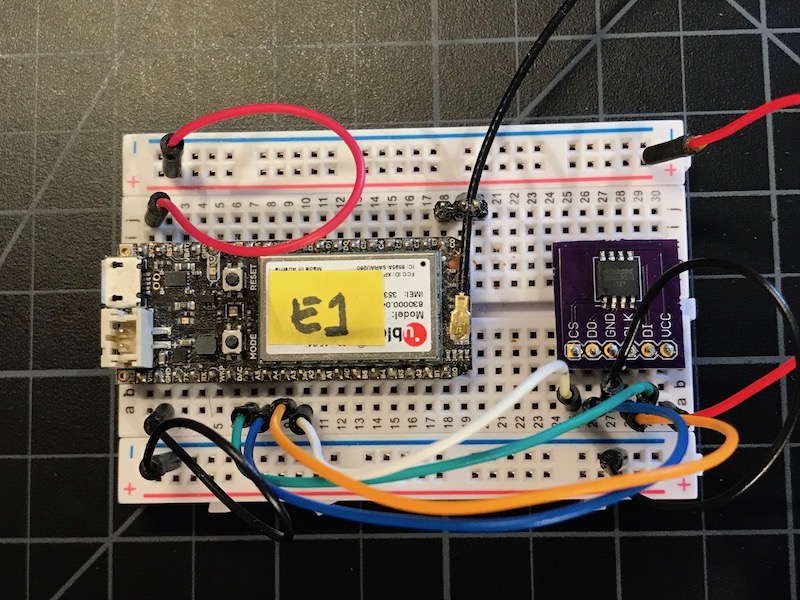
Connecting the hardware
The real intention is to reflow the 8-SOIC module directly to your custom circuit board. However, for prototyping, here are some examples:
For the primary SPI (SPI):
| Name | Flash Alt Name | Particle Pin | Example Color |
|---|---|---|---|
| SS | CS | A2 | White |
| SCK | CLK | A3 | Orange |
| MISO | DO | A4 | Blue |
| MOSI | D1 | A5 | Green |
For the secondary SPI (SPI1):
| Name | Flash Alt Name | Particle Pin | Example Color |
|---|---|---|---|
| SS | CS | D5 | White |
| SCK | CLK | D4 | Orange |
| MISO | DO | D3 | Blue |
| MOSI | D1 | D2 | Green |
Note that the SS/CS line can be any available GPIO pin, not just the one specified in the table above.
- Electron using Primary SPI
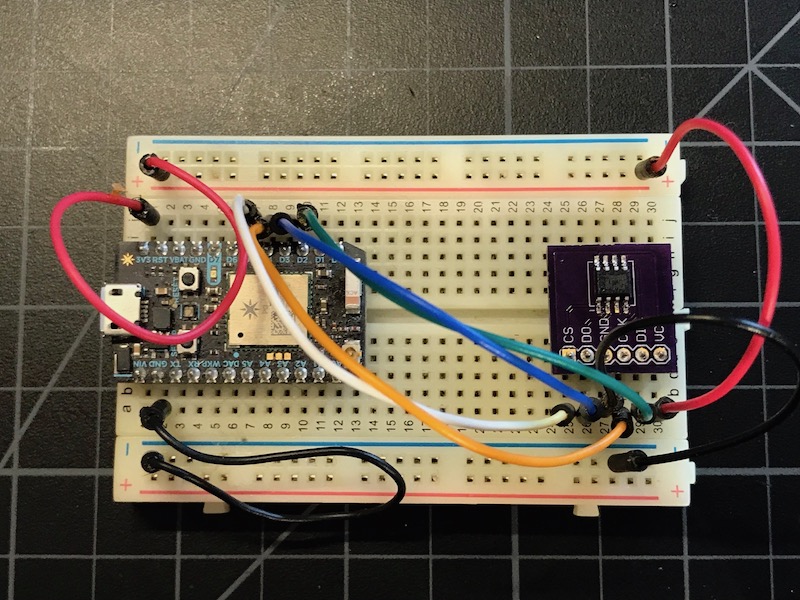
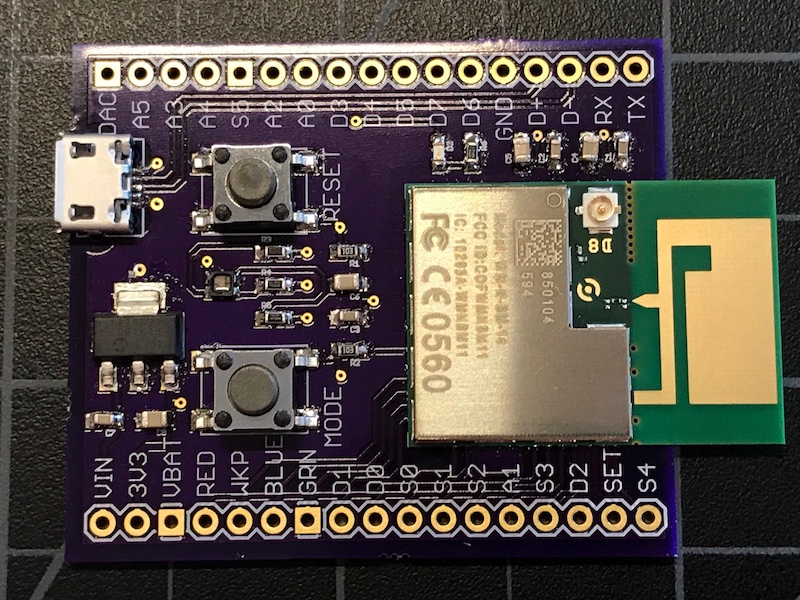
- Photon using Secondary SPI (SPI1)
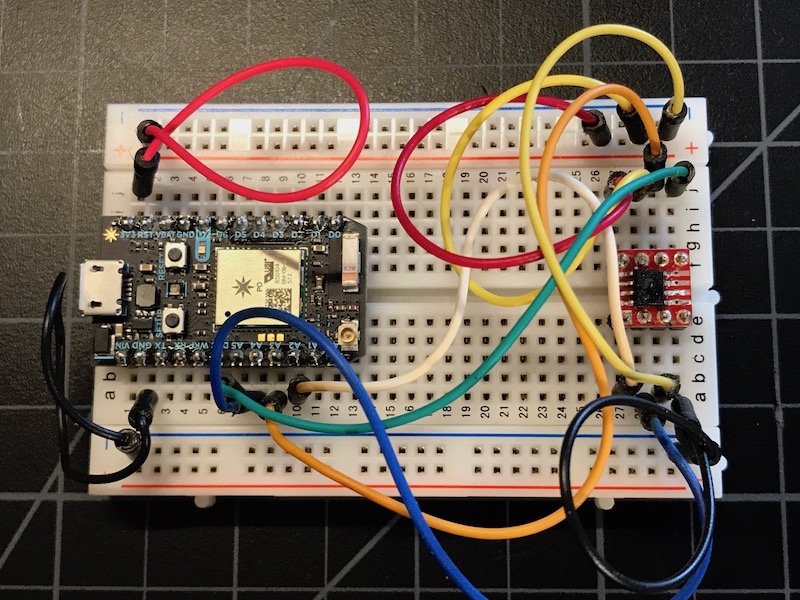
- Photon using Primary SPI and a poorly hand-soldered 8-SOIC adapter
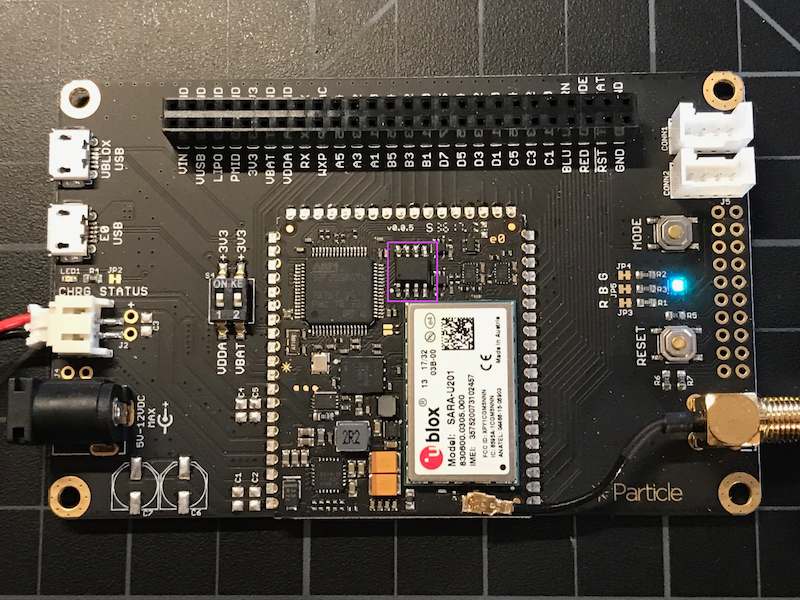
- E-series evaluation kit with a Macronix MX25L8006EM1I-12G soldered to the E-series module (outlined in pink).
- P1 module (extra flash is under the can)
Using the SPIFFS API
Background
A few things about SPIFFS:
- It's relatively small, way smaller than SDFAT at least.
- It has the bare minimum of things you need to store files.
- You can allocate all or part of the flash chip to SPIFFS.
In particular, there are two important limitations:
- It does not support subdirectories; all files are in a single directory.
- Filenames are limited to 31 characters.
- It does not have file timestamps (modification or creation times).
Within the scope of how you use SPIFFS these shouldn't be unreasonable limitations, though you should be aware.
Like most file systems, there are a few things you must do:
- You must mount the file system, typically at startup.
- If your flash is blank, you'll need to format the file system.
- You can iterate the top level directory to find the file names in it.
- In order to use data in a file, you must open it and get a file handle, read or write, then close it.
- There are a finite number of files that can be open, but you can set the maximum at mount time. The default is 4.
- If you think the file system is corrupted, you can check and repair it.
Once you get it working, there is some fine-tuning you can do:
- The cache size is programmable, which speeds up operations at the cost of additional RAM. The default is 2 logical blocks.
- The logical block size is programmable. Using larger blocks can make using large files more efficient in flash storage, at the cost of more RAM and making small files less efficient in flash storage. The default is 4K, and can't be made smaller but can be made larger.
- Even with the default settings, it's surprisingly fast (see the benchmarking section, below).
Example 1 - Simple
This example should be pretty straightforward:
In more detail:
This determines the log level. If you want fewer logs, uncomment the first SerialLogHandler definition and comment out the second.
This sets up an ISSI flash chip on primary SPI (SPI), with A2 as the CS (chip select or SS line). You can comment this out and uncomment one of the other lines for other configurations.
This sets up the SpiffsParticle object using that flash chip. You will typically create this object as a global variable.
You must call begin() on the flash object. Then you must set the size of the file system. This is 1 Mbyte. The SPIFFS file system can use only a part of the flash, if you want. It can't be resized without reformatting, however.
Finally, you must mount the file system. This call mounts it, if not formatted, will format it and try to mount it again.
This block of code opens the file, creating it if necessary.
It writes the line hello world to the file.
Then it reads the line back and prints it to the debug serial.
Once you get your filesystem working, you may want to eliminate the info messages from Spiffs. This can be done by using the categories feature of the log handler:
Other examples
The 2-self-test example runs a bunch of tests to verify functionality. It also shows how to use most of the functions.
The 3-stop-sleep example shows how to use stop mode sleep (pin + time) to efficiently and safely manage the flash. Since stop mode sleep preserves the contents of RAM, you don't need to re-mount the file system or even the close and open the files. You can just continue where you left off.
Benchmarking
The 5-benchmark example runs some tests to evaluate the speed of the file system. This log is testing a 1 Mbyte ISSI flash chip on a Photon.
The format operation is slow, about 14 seconds for a 1 Mbyte flash. Fortunately you shouldn't have to format often (probably only once).
The bulk write and read test does 512 byte operations sequentially. It's able to write 256 Kbytes in 1.5 seconds. It can read it in 264 milliseconds.
The append and flush test writes 100 bytes and flushes the contents to flash so they'll be preserved if there is a power outage. It's able to do 5000 append and flush operations in 831 milliseconds.
Reading the blocks back only takes 104 milliseconds.
Resource usage
The code space used by the library is slightly less than 30 Kbytes. This includes both the SpiFlash and Spiffs libraries and the Wiring/Arduino Stream compatibility.
The RAM usage is dependent on various settings.
- Work buffers (2 * logical page size), default is 2 * 256 = 512
- File descriptor buffers (32 * max open files), default is 32 * 4 = 128
- Cache (logical page size + 32) * cachePages + 40 byte, default is (256 + 32) * 2 + 40 = 616
- Thus the total RAM allocated during mount is by default is 1256 bytes
This memory is freed if you unmount, though in most cases you'll keep the volume mounted all of the time.